
How to Install Switch Always On™
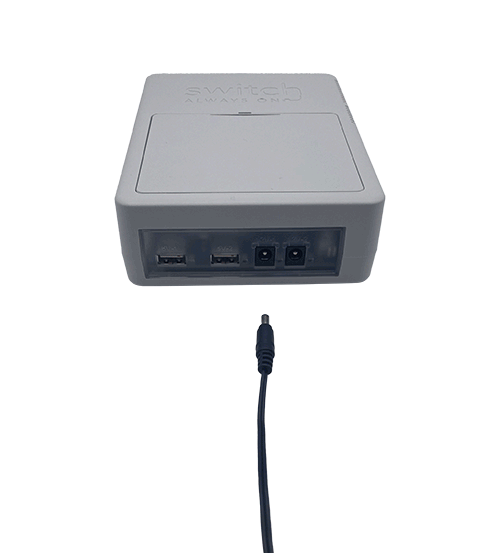
1. Connect to AC Power
Connect the AC cable to the AC port located on the side of your Switch Always On™ device.
Next, plug the cable end into an AC power outlet.

2. Connect Equipment to the DC Ports
a. Disconnect the existing adapter cables from your equipment and read the output voltage on the back of the adapters.
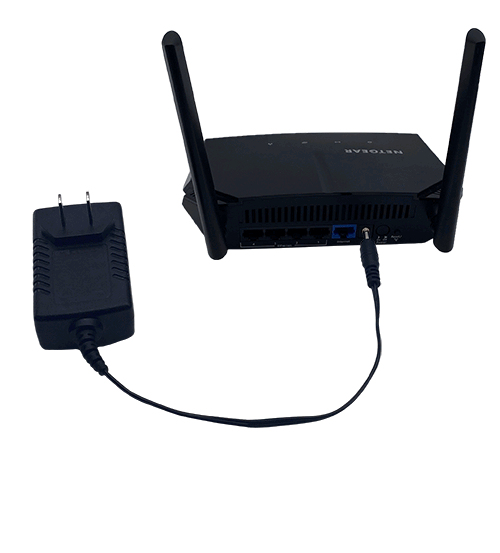
b. Next, take a DC cable and connect it to either the 5V USB or 12V barrel connector output of Switch Always On™ depending on your equipment’s input voltage.
Then, connect the other end of the DC cable to your equipment. If the DC cable does not fit your input, select one of the adapters from the connector kit.
3. Connect to Ethernet (Optional)
Place the Ethernet cable into the Ethernet port, located on the side of your Switch Always On™ device.
Next, connect the other end of the Ethernet cable to the Ethernet port of a cell modem or a Wi-Fi router.

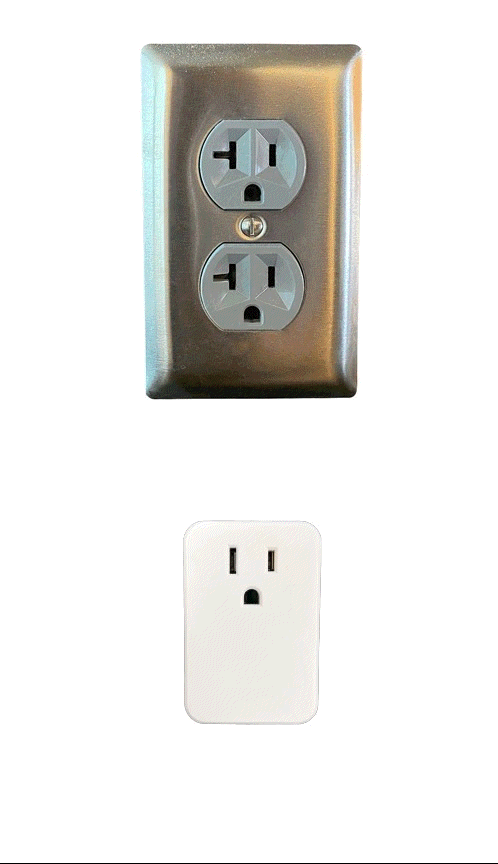
4. Connect the AC Power Plug (Optional)
To reboot your equipment or device that uses mains power from a wall socket, you’ll need an AC power plug.
Insert the AC power plug into the wall socket, attach the provided 3-Pin connector cable to the AC power plug, and connect the other end of the cable to one of the 5V USB ports on the Switch Always On device.
Next, connect your equipment to the power plug. Make sure that the AC power plug is connected to an enabled port using the Switch Always On App.
5. Mobile App and User Registration
Download the “Switch Always On” mobile app in the App Store or on Google Play.
Next, provide your user information and confirm your email address using the link in your activation email.
6. Switch Always On™ Configuration Setup
After you’ve confirmed your email, log back into the Mobile app to start the Quick Setup flow. From here, select “Scan QR code” and locate the QR code sticker on the back of your device.
Next, on the Mobile App, select “Connect to SWITCH Setup Network Directly” and you’ll receive a notification with your Switch Setup Network ID. Using this ID, search from your available Wi-Fi Networks and connect to the Network associated with your device’s MAC address (e.g. SWITCH_30aea4d47800).
From here, you can name your device and set a password (optional).
Finally, select the Wi-Fi Network your Switch Always On device will connect to and you’re all done.
If you’d like further details on the setup and operation of Switch Always On™, download our User Manual by visiting Switch Always On Manual or send us an email at info@switchalwayson.com for real-time support.